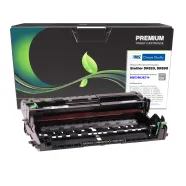
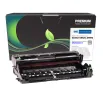
MSE Remanufactured Drum Unit for Brother DR820/DR890

MSE Remanufactured Drum Unit for Brother DR820/DR890

  • MSE58038214
  • Laser Drum
  • Brother - DR820
    Brother - DR890
  • Black
  • 50,000 Pages *

How do I purchase these products?

RESELLER

If you are a reseller, please log-in or register to become a Clover dealer.

BUSINESS OR CONSUMER

Please fill out this brief form to be contacted about purchasing Clover products.

BUSINESS OR CONSUMER

Thank you for your interest!

Your request has been forwarded to your local Clover Imaging products dealer and you will be contacted within 2 business days.

Additional Product Information

Technical Specifications

Product Box Dimensions:

  • EA
  • 14 in
  • 4.5 in
  • 7.375 in
  • 2.3 lbs

Videos and Downloads

Product Related Videos:

  • Lower Your Carbon Footprint with Sustainable Toner Cartridges

Product Related Downloads:

Product Troubleshooting

Possible Troubleshooting

How to Reset a Brother DR820/DR890 Drum Unit

If your Brother printer continues to display Replace Drum, Drum End Soon, or a similar drum-life message after installing a new DR820/DR890 drum unit, the drum counter may not have been reset correctly.

This guide explains how to manually reset the drum counter on Brother printers that use the DR820/DR890 drum unit.

Compatible Brother Printers:
Brother DCP-L5500DN, DCP-L5600DN, DCP-L5650DN; HL-L5000D, HL-L5100DN, HL-L5200DW, HL-L5200DWT, HL-L6200DW, HL-L6200DWT, HL-L6250DW, HL-L6300DW, HL-L6400DW, HL-L6400DWG, HL-L6400DWT, HL-L6400DWX; MFC-L5700DW, MFC-L5800DW, MFC-L5850DW, MFC-L5900DW, MFC-L6700DW, MFC-L6750DW, MFC-L6800DW, MFC-L6900DW, MFC-L6900DWG, MFC-L6900DWX

Before You Reset the Drum

• Install a new DR820/DR890 drum unit.
• Transfer the toner cartridge into the replacement drum unit, if necessary.
• Make sure the toner cartridge is properly locked into the drum unit.
• Reinstall the drum and toner assembly into the printer.
• Make sure the printer is powered on.

Note: Do not reset the drum counter unless you are replacing the drum unit. Brother specifically warns against resetting the counter while continuing to use the existing drum.

Drum Reset Instructions

HL Series Models
(HL-L5000D, HL-L5100DN, HL-L5200DW, HL-L5200DWT, HL-L6200DW, and HL-L6200DWT)

1. Make sure the printer is turned on.
2. Open the front cover.
3. Press and hold OK for approximately two seconds until Drum Unit appears.
4. Press OK.
5. Press the Up Arrow to reset the drum counter.
6. Close the front cover.

(HL-L6250DW)

1. Make sure the printer is turned on.
2. Open the front cover.
3. Press and hold OK for approximately two seconds until Drum Unit appears on the display.
4. Press OK.
5. Press the Up Arrow to select Reset and reset the drum counter.
6. Close the front cover.

(HL-L6300DW)

1. Make sure the printer is turned on.
2. Press Settings.
3. Select Machine Information.
4. Select Parts Life.
5. Press and hold Drum Life until the display message changes.
6. Press Yes to confirm the reset.
7. Press Home to return to the main screen.

(HL-L6400DW, HL-L6400DWG, HL-L6400DWT, and HL-L6400DWX)

1. Make sure the printer is turned on.
2. Press Settings.
3. Select All Settings.
4. Select Machine Information.
5. Select Parts Life.
6. Press and hold Drum Life until the display message changes.
7. Press Yes to confirm the reset.
8. Press Home to return to the main screen.

The printer should now recognize the new DR820/DR890 drum unit.

DCP Series Model
(DCP-L5500DN, DCP-L5600DN, and DCP-L5650DN)

1. Make sure the printer is turned on and the front cover is closed.
2. Press Settings.
3. Select All Settings, if displayed.
4. Select Machine Info. or Machine Information.
5. Select Parts Life.
6. Press and hold Drum or Drum Life until the display message changes.
7. Press Yes to confirm.
8. Press Home to exit the menu.

The drum counter should now be reset.

MFC Series Models
(MFC-L5700DW, MFC-L5705DW, MFC-L5800DW, MFC-L5850DW, MFC-L5900DW, MFC-L6700DW, and MFC-L6800DW)

1. Make sure the printer is turned on and the front cover is closed.
2. Press Settings.
3. Select All Settings, if displayed.
4. Select Machine Info. or Machine Information.
5. Select Parts Life.
6. Press and hold Drum or Drum Life until the display message changes.
7. Press Yes to confirm the reset.
8. Press Home to exit the menu.

(MFC-L6750DW)

1. Make sure the printer is turned on and the front cover is closed.
2. Press Settings.
3. Select All Settings.
4. Select Machine Info. or Machine Information.
5. Select Parts Life.
6. Press and hold Drum until the display message changes.
7. Press Yes to confirm the reset.
8. Press Home to exit the menu.

(MFC-L6900DW, MFC-L6900DWG, and MFC-L6900DWX)
1. Make sure the printer is turned on.
2. Press Settings.
3. Select All Settings, if displayed.
4. Select Machine Info. or Machine Information.
5. Select Parts Life.
6. Press and hold Drum or Drum Life until the display message changes.
7. Press Yes to confirm the reset.
8. Press Home to exit the menu.

The drum counter should now be reset.

Common Error Messages

A drum reset may be required if your Brother printer displays any of the following messages after installing a replacement drum:

• Replace Drum
• Drum End Soon
• Drum Stop
• Replace Parts
• Drum Error

The exact message can vary by printer model.

Troubleshooting

If the drum message remains after completing the reset:

1. Confirm that the drum unit was replaced and that the reset procedure matches the printer model.
2. Repeat the reset procedure carefully.
3. Check that the drum unit and toner cartridge assembly are seated correctly.
4. If the message persists, consult the printer's model-specific Brother support documentation.

If the message continues after the correct reset procedure, the printer may not have accepted the reset command or there may be an issue with the drum unit or printer.

Frequently Asked Questions

Do I need to reset the drum counter when I replace toner?
No. The drum counter should only be reset when replacing the drum unit.

How long should a DR-820 drum last?
Brother specifies approximately 30,000 pages based on one page per job, with a higher estimated yield under longer print runs.

How long should a DR-890 drum last?
Brother specifies approximately 50,000 pages based on one page per job, with a higher estimated yield under longer print runs.

Why does my printer still say “Replace Drum” after installing a new drum?
The drum counter may not have been reset, or the reset may not have been completed correctly.

* Page yield based on 5% page coverage prints.

Yield Increase
Close

Clover Imaging extended yield remanufactured printer cartridges are designed, engineered, and manufactured to offer superior quality and performance, while surpassing the OEM’s highest page yields. Extended yield cartridges guarantee higher yields and lower cost-per-page without sacrificing density or print quality. Clover Imaging’s extended yield remanufactured printer cartridges are highly sustainable and have been GreenCircle certified as closed-loop products that contain at least 86% recycled content. For businesses looking for high-quality, sustainable printing at an affordable price, the choice is clear.

Recycled Content Certified
Close
Recycled Content Certified

GreenCircle is an independent, third-party ecolabel that recognizes an organization’s commitment to reuse materials to support a circular economy and reduce their reliance on virgin materials. Clover Imaging remanufactured toner cartridges are GreenCircle-certified to contain 86% recycled content and inkjet cartridges are certified at 99%.

Low-Emissions Toner
Close
Low-Emissions Toner

Low-emission toners used by Clover Imaging have been pre-approved by Nordic Ecolabelling for use in Nordic Swan Ecolabel-certified remanufactured printer cartridges. These toners are specially formulated to ensure that applicable Nordic Swan Ecolabel requirements are met, including criteria placing strict limits on volatile organic compound emissions and prohibiting the presence of certain pollutants and other harmful substances.

Close

Sign Up For More Information

- SIGN UP TODAY! -
Close

Thanks For Signing Up!

Register now to start saving 40% over OEM pricing

2022 Aspire Sustainability Comparative LCA, commissioned by Clover Imaging.

Information
Close
Information
Close
Information
Close
Payment Information

To use the Clover Recycling Center, you must provide a credit card which may be charged on a monthly basis to offset program costs. Charges will vary depending on the contents of your return shipments.

View program terms and conditions

* Required Field
Notification
 
Close

 
Close

INFORMATION
Close

Press OK to switch region to Clover Imaging

Retrieve account data
Close
To retrieve your login data, enter your email:
 
Please wait...
Information

Thank you for your interest in Clover! Due to the robust functionality on our website, we can only support the most current web browsers. We recommend upgrading your browser to the latest version of Internet Explorer, Google Chrome or Mozilla Firefox.

Error retrieving data
Close
Thank you
Close
Video
Close
Video
Close
Video
Close
Video
Close
Video
Close
Web Tutorial
Close
Terms and Conditions
Close
Clover Video
Close
Warning
Close
Email
Close
To download this certificate, please provide your email address. You will receive the requested file within 10 minutes.
 
Collection and use of email address governed by our Privacy Policy
PROMOTION DETAILS
Close